How To Make Cafe-Quality Latte At Home (Easy Step-by-Step Process)
If you’re into coffee, making a true café-quality latte at home can be surprisingly doable. I learned the ropes through plenty of trial and error, and there’s nothing quite like sipping a velvety homemade latte that rivals what your favorite barista serves up. This step-by-step latte tutorial will walk anyone from absolute beginner to confident home barista. I’m also sharing gear tips and troubleshooting tricks to keep your lattes smooth, not sour or flat.

Basic Equipment for Brewing Lattes at Home
Starting out doesn’t mean you need a highend espresso machine right away, but a few key pieces of equipment really raise your latte game. Investing in the right tools not only helps you brew consistently good drinks, it also makes the whole process more fun and less stressful.
Here’s what I reach for whenever I’m craving a latte:
- Espresso Machine: The classic choice for home lattes. Machines like the Breville Barista Express or Gaggia Classic are reliable picks for most beginners. Entrylevel singleboiler or manual lever machines work too.
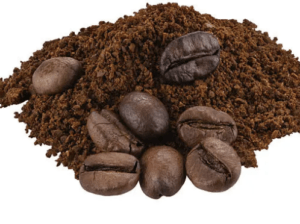
- Burr Grinder: Grinding fresh coffee beans right before you brew makes a big difference in taste. Hand grinders or small electric burr grinders both get the job done.
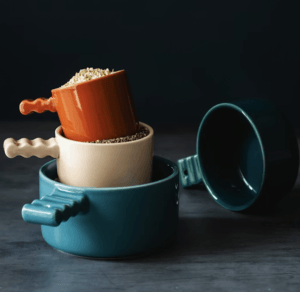
- Milk Frothing Pitcher: A 12–20 oz stainless steel pitcher is perfect for creating microfoam. I use the WPM Milk Pitcher for great pour control and professional results.
- Scale: A small digital scale (Acaia Lunar or Timemore Black Mirror are popular) helps dial in espresso and milk ratios.
- Alternative Frother: If you don’t have an espresso machine with a steam wand, a handheld milk frother, Nespresso Aeroccino, or manual French press can froth milk nicely.
- Coffee Beans: Fresh, highquality beans make a noticeable difference. Go for espresso roast or medium roast blends for that classic cafe flavor.
 For folks without an espresso machine, you can still get pretty close. Tools like a Moka pot or AeroPress work for the coffee concentrate part, and a standalone frother does the milk. Many home baristas also experiment with iced lattes, modifying their process by chilling the espresso and milk before mixing—a great way to enjoy lattes year-round. As you experiment, you might discover unique blends or flavored syrups that suit your tastes, making each cup a fun, new experience.
Step-by-Step Latte Recipe: Beginner Latte Tutorial
Brewing a latte at home just takes a bit of patience and the right approach. Here’s my goto method, simplified for beginners and repeatable for pros:
- Weigh and Grind: Measure out 18–20 grams of freshly roasted beans (for a double shot) and grind them fine, about the consistency of table salt.
- Prep Your Machine: Preheat your espresso machine for 10–15 minutes. Rinse your portafilter with hot water if you have time. You can also heat your cup during this stage, which helps keep your latte warmer longer and ensures consistent taste.
- Dose and Tamp: Fill the portafilter with ground coffee, level it out, and tamp firmly with even pressure.
- Brew Espresso: Insert the portafilter, start your shot, and time it. 25 to 30 seconds for a double is the sweet spot. Aim for about 40–45g espresso output.
- Froth Milk: Pour cold milk into your pitcher until it’s just below the spout. Fullfat dairy works best, but oat milk (like Oatly Barista) and other alternatives can froth well too. You can mix in a dash of vanilla or other flavorings before heating for additional dimension.
- Steam and Texture: Purge your steam wand, submerge just under the surface, and introduce air gently (listen for soft splutters). Once the milk expands slightly, submerge more for a swirling motion to polish the foam.
- Combine: Swirl the milk so it’s glossy and blends with the foam, then pour the milk gently into the espresso. Tilt and lower the pitcher to draw latte art if you’re feeling creative. Use your favorite mugs or glasses to show off your eye-catching creations and personalize each cup for an even better experience.
That’s it, you’ve got a homemade latte. Fine-tune your ratios and practice, and you’ll achieve silky microfoam naturally. As you gain confidence, try pulling new espresso blends or using single origin beans to dig into the incredible taste possibilities that specialty coffee offers.
Guide to Milk Frothing: Getting That Microfoam
Milk texture makes or breaks a caféstyle latte. Proper microfoam is glossy, smooth, and has tiny bubbles. Using whole milk works best for beginners since it’s forgiving and creates creamier foam, but nondairy options can deliver as well when you use barista blends. Experimenting with alternative milks—almond, soy, coconut—lets you find what you like best or what fits your dietary needs. Each type foams a bit differently, so be patient while getting the technique right.
Here’s how I do it on a steam wand:
- Fill and Purge: Fill the pitcher with cold milk up to the bottom of the spout. Always purge (blast steam) to clear old water from the wand.
- Stretch: Hold the wand tip just beneath the surface and turn on steam. You’ll hear a gentle hissing. This stage is for “stretching” the milk by adding air.
- Spin and Polish: Lower the steam tip a bit deeper to spin the milk into a whirlpool. This folds in any bubbles and polishes the microfoam for a shiny, paintlike finish.
- Temperature: Stop when the pitcher feels just a little too hot to touch on the bottom (about 140–150°F if you use a thermometer).
No steam wand? Handheld frothers and the French press method, where you pump heated milk rapidly, both add air and create froth. Swirl or bang the pitcher after frothing to pop big bubbles and improve texture. Some people even use a jar with a lid—shake vigorously with hot milk to create foam. It’s an easy DIY trick for the starter barista.
If you’re feeling adventurous, you can experiment with infusing your milk with spices like cinnamon or nutmeg before frothing. It adds an extra layer of flavor to your latte and keeps things interesting. Over time, you’ll track down your favorite milk ratio, amount of foam, and the perfect creaminess for your taste buds.
Latte Art Basics: Simple Designs for Beginners
Latte art takes practice, but starting with hearts and simple forms is rewarding and fun. Don’t stress getting it perfect. The goal is to create a smooth pour so that the milk and coffee blend together elegantly. Keep experimenting with different jug angles and pouring speeds until you spot what works best for you.
- Start With Good Microfoam: Smooth, thick milk makes pouring easier and helps art hold its shape.
- Pour Steadily: Begin with the cup at a slight angle. Pour slowly to mix the milk with the coffee, then move the pitcher closer and pour faster for the heart shape or basic dot. Steady hands help, so try to relax and enjoy the process.
- Practice Motions: Drawing circles or lines with your wrist while pouring creates patterns. The more you practice, the better control you’ll get. Start simple, and as you improve, dig into more complex shapes like rosettas or tulips.
There are loads of latte art video tutorials online. They’re worth checking out when you want to take things up a notch and wow your friends or family with nextlevel cool presentations. You might even create your own signature pour.
Troubleshooting: Fixing Sour, Bitter, or Flat Lattes
Even with care, sometimes a homemade latte falls flat or tastes off. Here are quick fixes for the most common issues:

- Sour Shot: Usually caused by underextraction (too coarse grind, short shot, or low temp). Try grinding finer, a longer extraction, and/or make sure your water is hot enough.
- Bitter/Burnt Taste: Overextracted espresso is likely (too fine grind, high dose, or running the shot too long). Adjust grind coarser, lessen dose, or aim for that 25–30 second window.
- Flat or Thin Milk: Not enough air was added, or milk overheated. Introduce more air at the start, and don’t steam above 150°F.
- Big Bubbles: Milk was stretched too long or the tip was too high. Focus on a short, controlled stretch and keep the tip just below the surface for swirling.
- Poor Latte Art: Milk texture is often the culprit, so aim for glossy paint consistency. Pour more confidently right in the middle of the cup after mixing milk and espresso.
Keep notes on what works (and what totally flops). Tweaking one variable at a time helps you understand what’s happening and nail down a repeatable process. It’s a learning curve, but every cup you brew will teach you something new. Joining a coffee enthusiast forum online or asking questions at your local café can give a boost to your learning as well. Don’t be shy about asking for tips!
Recommended Gear for Consistent Lattes at Home
If you want to seriously upgrade your homemade latte setup, a few tools stand out after years of experimenting:
- Espresso Machine: Breville Barista Express and Gaggia Classic Pro offer great consistency with steam power for milk.
- Milk Pitcher: WPM and Motta stainless pitchers have ergonomic handles and pouring spouts perfect for latte art.
- Digital Scale: Timemore Black Mirror is affordable and easy to use, while Acaia Lunar is a higherend café favorite. Both help with repeatability.
- Handheld Frother: The PowerLix Milk Frother is simple, affordable, and great for those not ready for a machine.
- Thermometer: An instantread thermometer keeps milk steaming on point, preventing scalded milk.
While you don’t need all this at once, investing in one or two great tools will give you cafélevel results more often and make homemade lattes something to look forward to every morning. Ease into your new gear one item at a time as your interest grows and skills improve. Sharing your setup and results with fellow coffee fans online can be motivating and spark new ideas, too.
Frequently Asked Questions: Beginner Latte Tutorial
New to latte making? Here are some of the most common questions I get (and answers I wish I’d known sooner):
Question: Can you make a latte at home without an espresso machine?
Answer: Yes! Use strong coffee from a Moka pot or AeroPress as your base. Froth milk with a handheld frother, French press, or even by shaking hot milk in a jar and gently pouring off the foam. It won’t be quite the same as espresso, but it’s still delicious and satisfying. Many beginners start this way before deciding to invest in a machine.
Question: What’s the best milk for frothing?
Answer: Whole dairy milk is the most forgiving and gets you rich, shiny microfoam. Oat milk (Barista Edition) is a popular nondairy option that froths well too. Almond, soy, and coconut milks can work with some practice and the right brand. Try several to pick what matches your taste and frothing style.
Question: My latte always tastes too bitter or sour. What am I doing wrong?
Answer: Taste issues almost always come from espresso extraction. Try dialing in your grind, timing, and dose. Use fresh beans and filtered water for best flavor. If you’re still struggling, clean your machine and grinder more regularly—residue buildup can really impact taste over time.
Question: How do I practice latte art as a beginner?
Answer: Start with simple hearts and focus on making consistently smooth, velvety foam. Plenty of video tutorials online will help with basic techniques. Don’t worry about being perfect; practice makes all the difference. For extra practice, you can use water and dish soap in your pitcher, which behaves like milk for pouring without wasting ingredients. With enough reps, you’ll be pouring art in no time! Savor every sip!
This is a fantastic, accessible guide! As a devoted coffee lover who has spent far too much money in various cafés trying to capture that elusive perfect latte, your step-by-step process is a genuine game-changer for the home setup.
You’ve managed to distill complex barista techniques into something that feels immediately manageable, and I agree completely that the quality of the milk foam is what separates a good latte from a great one!
Thank you Leah! I hope you have fun experimenting with the techniques and products.
I am a huge latte lover, and this guide is exactly what I needed! I spend too much money at coffee shops, and the idea of being able to replicate that velvety microfoam and silky texture at home for myself and my family is incredibly appealing. I especially appreciate the detailed troubleshooting section, as I know my first few attempts will likely result in a bitter or flat disaster!
If I decide to invest in a decent burr grinder first, since you emphasized the importance of using fresh beans, and pair it with an AeroPress for making coffee concentrate, how closely can I expect to replicate a true café-quality latte compared to the results from an entry-level single-boiler machine like the Breville Barista Express?
Hi Leica,
Thanks for your comments. I’ve always considered latte to be a treat. With a little practice I believe you will not only replicate a cafe quality latte, I think you will improve upon it. I say this because you will be able to get great results with a machine like the Breville Barista Express and you will be able to tweak every aspect of your latte.
Enjoy!